Hate the Look of Speaker Clutter? Here’s the Secret to Flawless, Invisible Audio.
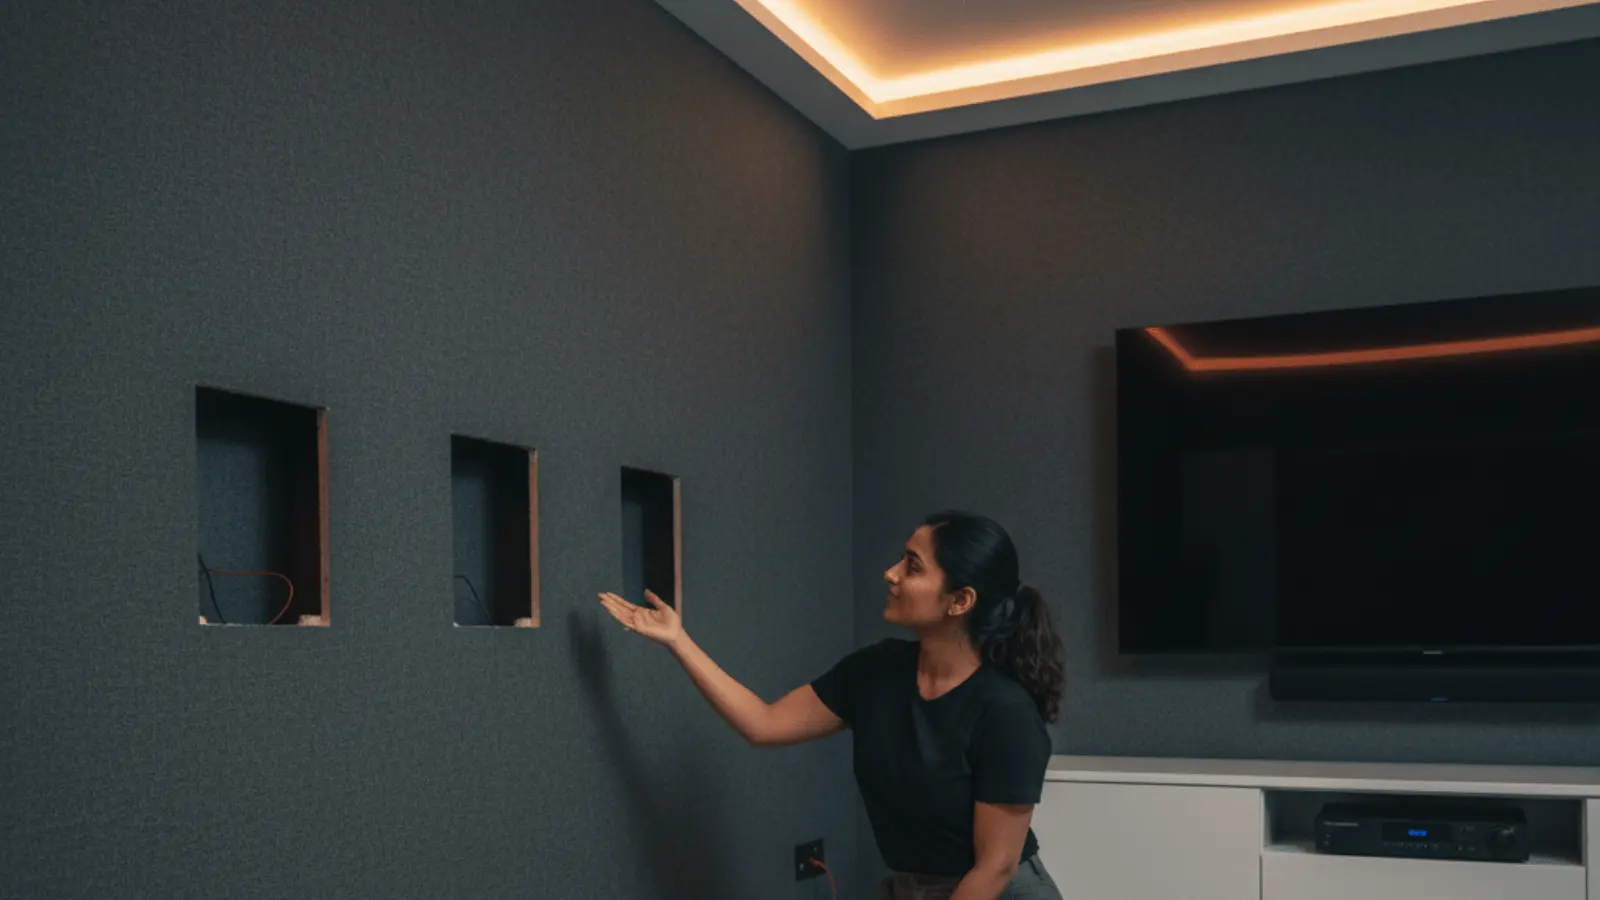
Let’s be honest. You’ve probably put a lot of effort into making your room look perfect, only to have it compromised by bulky speaker boxes, various surround speakers crowding your space, and a bunch of wires everywhere. You really want that amazing, powerful sound for watching movies, but you’re sick of having to sacrifice your room’s style just to get it. So, what if the answer wasn’t about finding smaller speakers, but finding a way to make them disappear?
Well, that’s the secret. This guide is all about opening the door to “invisible” audio. It’s the same trick that the pros use to design beautiful, simple-looking rooms that are secretly filled with incredible sound. We’re going to walk you through it, step by step, and help you turn that frustrating mess into a clean, stylish room with amazing sound that you set up yourself.
Stage 1: Choose the Best In-Wall and In-Ceiling Speakers
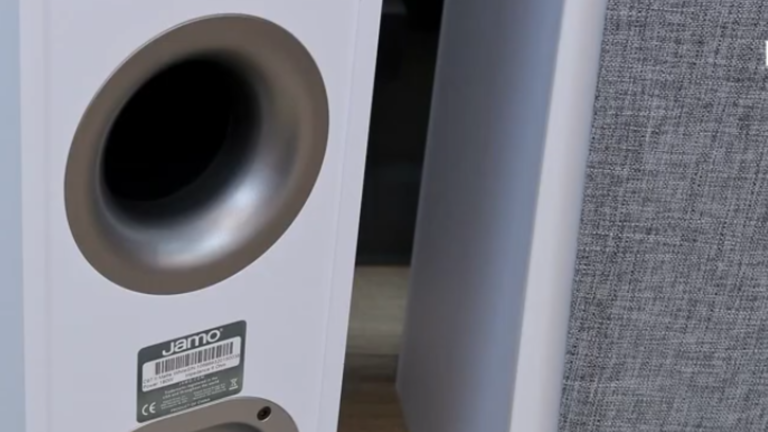
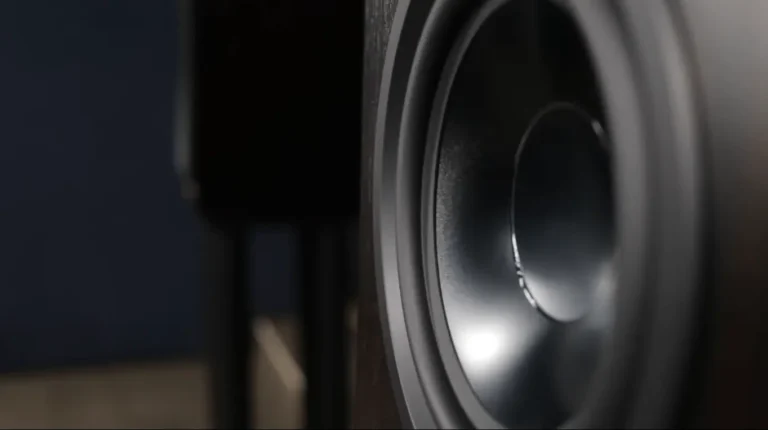
The selection of home theater speakers available today is extremely wide, encompassing a variety of sizes, designs, and price points. This guide will help you understand the different types of built-in speakers and their best use cases. While some of these models are excellent for music listening, our focus is on how to choose the best in-wall and in-ceiling speakers for your home theater system.
Check Out: How to Make Your Speakers Sound Twice As Expensive: A DIY Guide
Stage 2: Determine Speaker Placement
In our Guide to Home Theater Speaker Layout Options, we explain the best speaker configurations and how to adapt them to your room, with solutions for nearly any situation. We’ll also help you understand Dolby Labs’ speaker terminology and how it applies to your home theater. Combined with our design tools, you’ll have everything you need to begin your home theater journey.
Stage 3: Prepare for Installation
Before cutting into your walls or ceilings, make sure the chosen locations are free from obstacles such as pipes, ductwork, or electrical wiring.
Essential tools to have on hand:
- Drywall saw
- Level
- Stud finder
- Screwdriver
- Utility knife
- Wire stripper
- Drill and drill bits
- Glow rods
- Masking tape
- Pencil
Stage 4: Map Out Speaker Locations and Check for Obstructions
Most in-wall speakers require about 3.5 inches of depth, while most in-ceiling speakers need at least 5 inches behind the drywall for proper installation. Always check your specific speaker’s requirements.
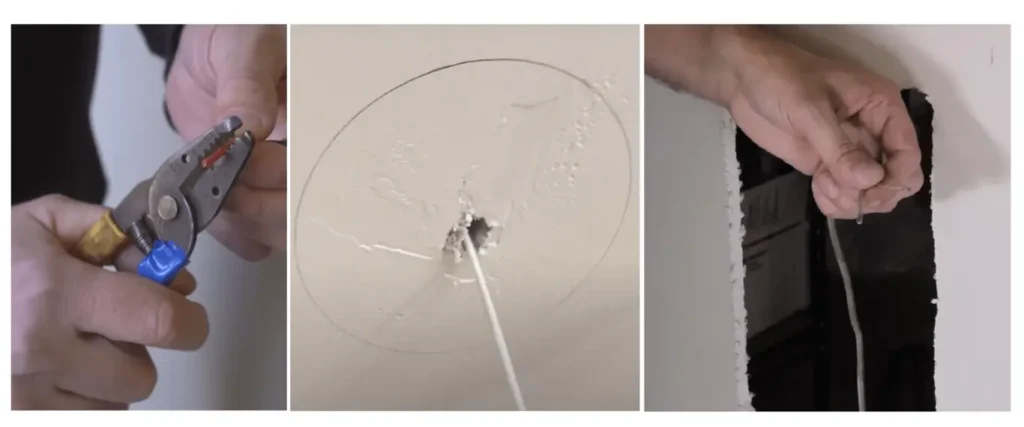
Once you’ve selected your mounting spots, use a high-quality stud finder to ensure the wall or ceiling is clear of obstructions. Stud finders can detect pipes, wires, and other potential issues. As an extra check, you can drill a small test hole and use a bent coat hanger to feel for hidden obstacles.
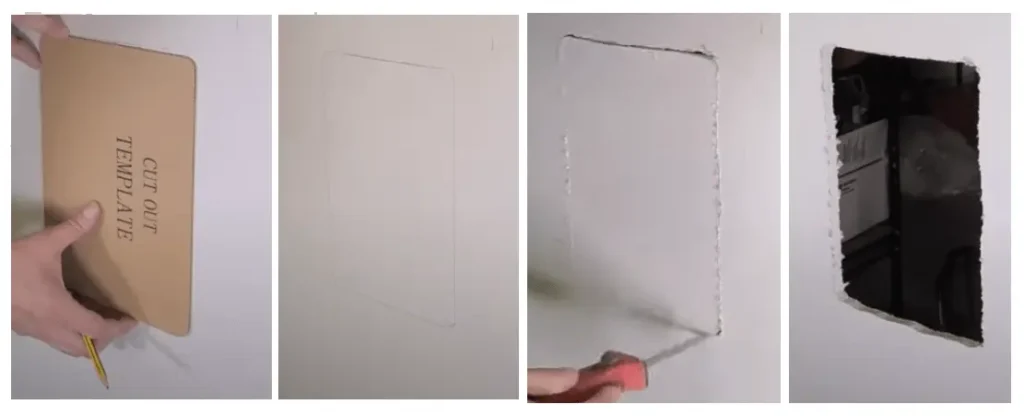
Stage 5: Trace and Cut the Openings
When you’ve confirmed the position is clear, it’s time to cut.
1. Use a level to align your speaker template.
2. Trace the cutout shape with a pencil.
3. Carefully cut along the line with a drywall saw.
Pro Tip: Start with a small exploratory cut inside the template. This lets you reach in with your hand or glow rod to double-check for clear space before cutting the full opening. If you need to relocate the speaker, this smaller piece can be reused for an easier drywall patch.
For new construction (before drywall goes up), most manufacturers sell rough-in brackets. These attach between studs, mark the speaker locations, and provide strong support once the drywall is installed.
Step 6: Hiding All the Wires
Now it’s time to get those speaker wires from your receiver to the spots where your speakers will go. If you can, the easiest way is to run them through an attic, a crawlspace, or even under the floor. If that’s not an option, you can carefully pop off your baseboards and tuck the wires behind them in the wall.
Don’t just use any old wire; make sure you get speaker wire that’s rated for in-wall use; it’s safer. Also, the longer the wire has to run, the thicker it should be to keep the sound quality strong.
Good for short runs: 16-gauge wire
Better for longer runs: 14-gauge or 12-gauge wire
A little pro tip: Leave some extra wire, maybe a foot or two hanging out of the hole where the speaker will go. This gives you some slack to make connecting everything much easier and is helpful if you ever need to adjust things later.
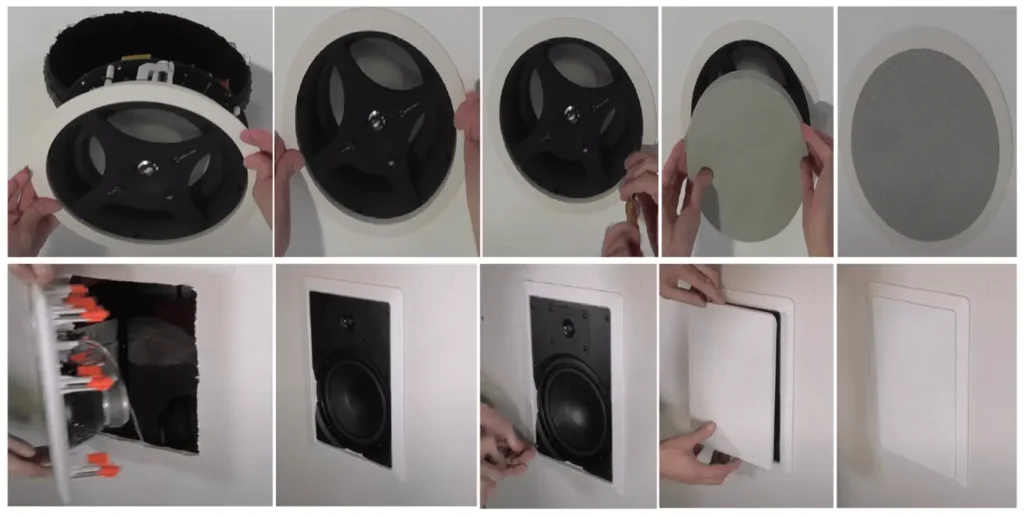
Step 7: Putting the Speakers In
If you want your speaker grilles to blend in by painting them the same color as your wall, do that before you install them. For the smoothest finish, use spray paint. The key is to use several light coats instead of one heavy one, and be sure to cover the actual speaker cone so no paint gets in the holes. A quick, light sanding first will help the paint stick better.
Once your wires are run and your paint is dry:
1. Connect the wires to the speakers. It’s simple: the red terminal on the speaker gets the positive (+) wire from your receiver, and the black terminal gets the negative (–) wire.
2. Very important: Double-check that your receiver or amplifier is turned OFF while you’re doing this.
3. Finally, just follow the instructions that came with your speakers to snap or screw them securely into the holes you cut.
So there you have it. By sticking with it, you’ve now got a home theater experience that feels totally immersive, all while keeping your room’s look clean and uncluttered. It’s the perfect win-win: no more big black boxes, just great sound that seems to come from nowhere.